After attending Rod Colledge’s presentation where he touched on steps in setting up Sharepoint 2010 Business Intelligence with SQL Server 2012 at SQL Saturday 138 in Sydney, I’ve decided that to be brave and tinker with Sharepoint installation and configuration a little bit more.
Recently I have this requirement to upgrade the SQL Server 2012 RC0 installation on a Sharepoint server to SQL Server 2012 RTM version. I decided to do a bit of research and typing in “upgrade sql server 2012 rc0 to rtm sharepoint” on Bing returned a few promising results. One of them was Jen Underwood’s comment posted at http://social.msdn.microsoft.com/Forums/en-US/sqldensetup/thread/cd7287b6-f587-4a87-9676-75ddc9b09800.
The worst case scneario that I could think of is that I would need to rebuild the Sharepoint server. That’s OK because luckily we’re still in an eval mode and not in live production yet. So I did the upgrade. For a non Sharepoint savvy person, the whole process took me about 1.5 hours including copying the SQL Server 2012 iso file across the network.
The good news is, it was successful! (Gee, I never thought that it would be this easy!)
Before we go ahead, I’d like to point out a few things:
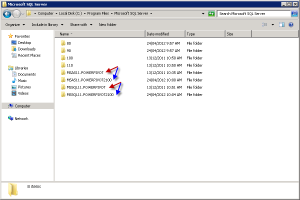
- At the end of the upgrade, the Sharepoint machine will have 2 installation paths of SQL Server for each instance, i.e. the existing SQL Server 2012 RC0 folder and SQL Server 2012 RTM folder. I am pedantic and try to avoid this as much as possible, but for now, it’s good enough; perhaps we may even be able to clean the folders up later.
- The target Sharepoint environment only has SQL Server installation specific for Sharepoint – i.e. SQL Server instances on the Sharepoint machine are not used by any other Applications (if they do, then make sure that they’re no live connection to the SQL Server instances).
- The Sharepoint server is not an Active Directory server.
- Test this upgrade method in a Test machine first before rolling out to Production.
Let’s get into it now.
[Warning: The below steps should be used as guidelines and should be tested in a Test machine first. If you are using a virtual machine for your Sharepoint server, don’t forget to create a backup prior to upgrading]
Prerequisites
- Administrator previlege on the machine as well as Sharepoint.
- SQL Server 2012 RTM version – and a product key for the Business Intelligence or the Enterprise Edition.
Steps
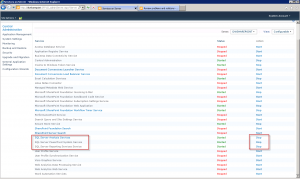
- Go to Sharepoint Central Administration > Manage Services on Server (under the System Settings heading). Stop the following services: SQL Server Analysis Services, SQL Server PowerPivot System Service, SQL Server Reporting Services Service.
- Run setup.exe of SQL Server 2012 RC0 and choose Maintenance.
- Select the “Edition Upgrade” option (although it only lists SQL Server 2005, SQL Server 2008 and SQL Server 2008R2 upgrade) which will show you the list of instances that can be upgraded.
- Select “POWERPIVOT” instance to be upgraded.
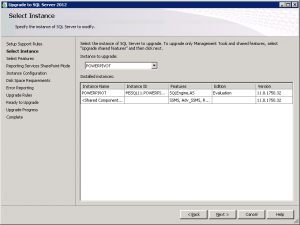
- Click Next to move on to the “Select Features” which will grey out all the features installed under POWERPIVOT.
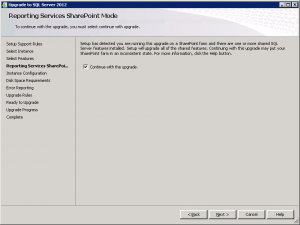
- Click Next to “Reporting Services Sharepoint Mode” which presents a message that Continuing with this upgrade may put your SharePoint farm in an inconsistent state. Tick on the “Continue with the upgrade.” option.
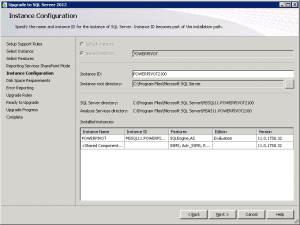
- Click Next to go to “Instance Configuration” which you will need to give a new name, e.g. POWERPIVOT2100
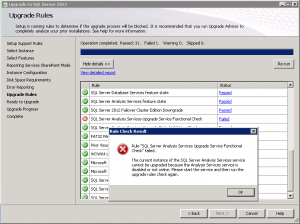
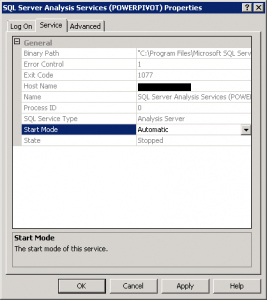
- Click Next until you reach “Upgrade Rules”. An error may come up stating that ‘Rule “SQL Server Analysis Services Upgrade Service Funcitonal Check” failed. The current instance of the SQL Server Analysis Services service cannot be upgraded because the Analysis Services service is disabled or not online. Please start the service and then run the upgrade rules check again‘. If this happens, go to SQL Server Configuration Manager and you will see that the Analysis Server is Stopped. Change this from Disabled to Automatic. (This may be because I stopped the SQL Server Analysis Services Service from Sharepoint earlier on).
- Click OK on the error dialog box and click Re-run on the Upgrade Rules window. It should rerun the upgrade checks and progress on to “Update Progress”.
- In the middle of the upgrade of SQL Server Analysis Services Service, a similar error will come up. “The following error has occurred: The service cannot be started, because it is disabled or because it has no enabled devices associated to it“. Again, go to SQL Server Configuration Manager and change the start mode from Disabled to Automatic.

- Click retry and the installation should resume normally to completion.
- Once this is done, you can verify the servers installed on the Sharepoint Server by launching SQL Server Management Studio and connecting to different parts of POWERPIVOT SQL Server instances.
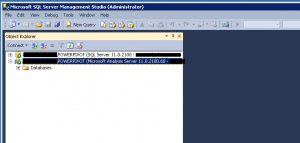
After the upgrade, don’t forget to reboot the Sharepoint server.
Post upgrade verifications
- Verify that your PowerPivot gallery or Default PowerPivot Service Application is running properly, by going to Sharepoint Central Administration > Manage Service Applications (under Application Management) > Default PowerPivot Service Application
- Verify that Microsoft.AnalysisServices.SharePoint.Integration.dll in Windows Assemby is referring to 11.0.2100.60 (right click on the dll, choose Properties and click on Version tab). More detailed info http://msdn.microsoft.com/en-us/library/ee210646(SQL.110).aspx#checkver
- Verify that msmdsrv.exe version is 11.0.21.00.60 in \Program Files\Microsoft SQL Server\MSAS11_00.PowerPivot\OLAP\bin (right click on the file, choose Properties and click on the Details tab). More detailed info http://msdn.microsoft.com/en-us/library/ee210646(SQL.110).aspx#checkver
And that is it! OK, I bet you can do this in less than 1.5 hours!
Hope you find this instruction useful. Please let me know if you have any suggestions on the steps that I may have missed out from the above.
No responses yet